Τρίτη 17 Σεπτεμβρίου 2013

5 tips για να απαλλαγείτε από την ψαλίδα


Η ψαλίδα, οι άκρες δηλαδή των μαλλιών μας που "ανοίγουν", είναι η ένδειξη πως έχουμε παραμελήσει την υγεία τους, η τρίχα έχει ταλαιωρηθεί και χρειάζεται επανόρθωση. Ο μόνος τρόπος για να την αντιμετωπίσουμε είναι το συστηματικό trimming αλλά αυτό δεν αρκεί. Καλό είναι να προσέξουμε και κάποιες συνήθειές μας που κουράζουν τα μαλλιά ώστε να προλάβουμε την εμφάνιση της ψαλίδας. Όπως:


1. Το πολύ συχνό λούσιμο. Στην θεωρία δεν φαίνεται κακό, στην πράξη όμως το καθημερινό λούσιμο ταλαιπωρεί τα μαλλιά. "Ξεγυμνώνει" την τρίχα από τα φυσικά της έλαια και αυτό μπορεί να την οδηγήσει στην ξηρότητα και άρα την κάνει πιο επιρρεπή στο σπάσιμο και την ψαλίδα.

2. Το πολύ συχνό brushing. Περιορίστε το σε μία φορά τη μέρα και κυρίως, προσέξτε τον τρόπο: αν τα μαλλιά σας μπερδεύονται προσπαθήστε σιγά σιγά και με υπομονή να τα ξεμπερδέψετε με την βούρτσα σας, μην τραβάτε και σπάτε τους κόμπους άγαρμπα. Ο καλύτερος τρόπος για αυτό είναι να χρησιμοποιήσετε ένα ειδικό προϊόν styling που μαλακωνει την τρίχα και μια μεγάλη χτένα με αραιά δόντια και να χτενίζετε τα μαλλιά αφού τα έχετε χωρίσει σε τούφες.

3. Στέγνωμα με την πετσέτα. Μετά το λούσιμο τυλίγετε τα μαλλιά με την πετσέτα, και μετά τα τρίβετε κιόλας για να απορροφήσει την υγρασία- σωστά; Λάθος! Το τρίψιμο των μαλλιών με την πετσέτα είναι ό,τι χειρότερο για την ψαλίδα και για την υφή της τρίχας γενικότερα. Μπορείτε να απομακρύνετε την υγρασία χρησιμοποιώντας την πετσέτα με ταμποναριστές κινήσεις, απαλά, σε όλο το μήκος των μαλλιών.

4. Η υπερβολική χρήση των εργαλείων styling. Εννοείται πως δεν μπορούμε να φανταστούμε τη ζωή μας χωρίς πιστολάκι (τουλάχιστον), αλλά καλό είναι να μην ξεχνάμε πως η θερμότητα- όσο και αν σε αυτήν οφείλουμε τα πιο τέλεια χτενίσματα- ταλαιπωρεί την τρίχα. Επομένως, όποτε έχετε τη δυνατότητα αφήστε τα μαλλιά σας να στεγνώσουμε φυσικά και μην ξεχνάτε ποτέ, να χρησιμοποιείτε τα ειδικά προϊόντα styling που προστατεύουν τα μαλλιά από τη θερμότητα.

5. Τεχνικές εργασίες (βαφή, ανταύγειες, ισιωτική κλπ). Η επιστήμη έχει κάνει άλματα τα τελευταία χρόνια στην ποιότητα των τεχνικών εργασιών, εξασφαλίζοντας άψογο αποτέλεσμα και  inimum ταλαιπωρία στα μαλλιά (και οι εξελίξεις συνεχίζουν να τρέχουν σε αυτό τον τομέα). Εσείς μπορείτε να βάλετε ένα έξτρα χεράκι, προσφέροντας στα μαλλιά σας τη σωστή φροντίδα στο σπίτι, με θρεπτικές και ενυδατικές φόρμουλες, leave on προϊόντα με έμφαση στις άκρες και βέβαια, προγραμματίζοντας τα ραντεβού σας με τον κομμωτή σας για trimming. 
5 tips για να απαλλαγείτε από την ψαλίδα

Πηγή:http://www.queen.gr/OMORFIA/diy/item/64897-5-tips-gia-na-apallageite-apo-tin-psalida#ixzz2f91VqDs7
Δευτέρα 16 Σεπτεμβρίου 2013

Hello! We are the gals from HowDoesShe and we are so excited to be a apart of this awesomeTeacher Appreciation series!
Our childrens’ teachers give so much of their time, talents, and energy for our children to succeed, so why not give them a little something to show your appreciation for their work?
Make a date with your child and customize a cute clipboard together for their awesome teacher!
clipboard_thankyou
Here’s how:

CUTE & CUSTOM CLIPBOARD TUTORIAL

Clip Board Tutorial Make

Clip Board Tutorial Make
1.  Choose your paper.  Cut around the clip ‘thing’ at the top.Clip Board Tutorial Make
2.  Smear Mod Podge ALL over the board.  Try not to get it on the clip, but around it!
3.  Place your paper on and squish it.  {Click for 10 steps to perfect mod podging.}
Clip Board Tutorial Make
4.  I wanted to make it a tad more fancy and add a ribbon.  I used the crop-a-dile and punched a hole in it.  Funny thing about that…my daughters were helping me make these clip boards and were in awe that mommy was strong enough to punch a hole through ‘wood’…it’s chip board (I didn’t tell them).
5.  Now to choose which ones to give to which teachers! :)
Clip Board Tutorial Make6.  Pair this up with some paper, pens and a card and you’ve got a cute present for a wonderful teacher!
Check out THESE other gift ideas for teachers, mothers, and everyone else on your list!
Thanks again for having us Cindy! We can’t wait to see all of the other brilliant teacher appreciation ideas!!!!!!!!!!!

10 Terrific Projects For Your Teen!

10 Terrific Projects For Your Teen
Are you surviving the week? I sure hope so! If you are like me and have older children, then your kids are in school and the house is a tad quieter during the day. If you have older kids then you also are probably plagued by the incessant chorus of “Mom, I’m bored!” regularly. In the past, we have shared loads of ideas from IShare to keep little fingers busy, but what about the older ones? They sometimes need more of a challenge to express themselves creatively, so today we are sharing 10 terrific projects that are perfect for teens! Yay! Thanks to your amazing submissions to the IShare websites, there are plenty of ideas to be found. Let’s check out a few!
Reusable fabric journal cover
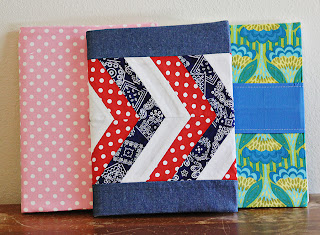
4R3Kids shares a super simple (i.e. even I can follow along) tutorial on how to make adorable, resuable, washable fabric notebook covers! This is the perfect way to teach  basic sewing and really let your teen’s personality become a part of her every day!
elements art
Have a science nut in the family? Craftiments created these awesome pieces of free printable art. These would look amazing framed on his bedroom wall, or even just pinned up in his locker at school! These are so cool.
Coconut Sugar Scrub
Your teenaged daughter will love how silky smooth her skin feels after using this sugar scrub, but she’ll love the fact that she MADE it even more! And guess what? It’s only two ingredients! Perfection.
Flower Vase Makeover
Big Bear’s wife took some thrift store finds and created these gorgeous remakes. Your teen will love putting her creative touch in her own style, then displaying her creation in her room for her BFFs to see!
Custom Colored Candy
I haven’t met a teen, yet, who doesn’t still love sugar. Or any food for that matter. PaperVine shares a simple way to custom color some candy! This will be a fun project that has the added benefit of being scrum-diddly-umptious!
Braided Rug
A quick trip to the local thrift store for some old sheets can quickly change into a wonderful project for your teen. Born Again Creations teach how to create a phenomenal braided rug that can be made in any color combination! Let their creativity flow! Not to mention the fact that they will be kept busy for hours – no smart phone required!
frame
Look Between The Lines shares another project that is shabby-chic and also allows your teen to display those ever-important photos! Your teen boys can use brown ribbon instead of lace – or even some wire!
Creative Caddy
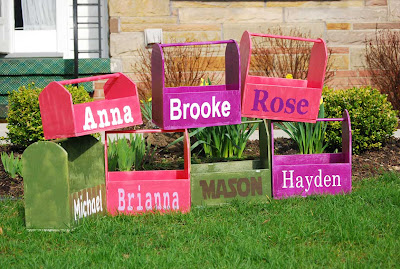
All teenagers have their stash of sentimental knick knacks, so why not help them make a personalized caddy like these from  My Creative Escapes?
Filing cabinet makeover
Mod Podge Amy shares how to make those boring old filing cabinets really ROCK! The kids might actually enjoy keeping their rooms organized with that! (I’m dreaming, right?)
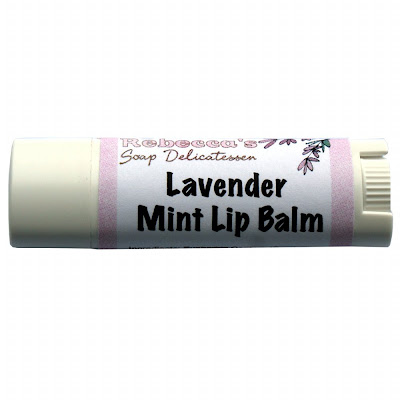
lavender lip balmHow fun would it be to have your teen make her own lip balm? Our friends over at Soap Deli share a simple how-to!
What are your favorite teenager-friendly projects that you have had success with? I’m always looking for new ideas, which is why I never fail to pop by the Ishare websites for some inspiration!


Natural looking beach curls in under 20 minutes!

 Gorgeous beach curls in under 20 minutes #beachcurls #hairI don’t know about you ladies, but I’m itching for the summer. It doesn’t help that department stores are already putting out their summer wear and swimsuits.  Have you ever wanted to get that beautiful “natural” beach curl look to your hair?  I want to share with you a technique that works for ALL types of hair, whether it be short, long, thick, thin, frizzy, or flat… and no curling iron involved!
Gorgeous beach curls in under 20 minutes #beachcurls #hair
1. Dampen your hair with a spray bottle or let it semi air dry after washing it.
As you can tell, I have a lot of wave to my hair, but this works for all hair types!
Gorgeous beach curls in under 20 minutes #beachcurls #hair
2. Part your hair into four sections. They don’t have to be sectioned perfectly. Tie them off to keep them separated from each other. Spray each section lightly with hair spray.

Gorgeous beach curls in under 20 minutes #beachcurls #hair
3. Start twisting your hair in the direction you want your curl to be. I twisted mine away from my face. Keep twisting until it tightens to the point it starts to coil on its own.
4. Coil it into a tight bun and then use bobby pins to keep it in place.
Gorgeous beach curls in under 20 minutes #beachcurls #hair
5. Blow your hair until it’s dry. The longer you dry it, the tighter your curl will be.
Gorgeous beach curls in under 20 minutes #beachcurls #hair
6. Undo the bobby pins and take your buns out of their coil.
Gorgeous beach curls in under 20 minutes #beachcurls #hair
7. Separate your curls using your fingers and then scrunch to add some body.
Gorgeous beach curls in under 20 minutes #beachcurls #hair
8. You’re finished! Lightly spray with hair spray then you’re good to go!
Gorgeous beach curls in under 20 minutes #beachcurls #hair
Something to keep in mind is, obviously, the wetter your hair is to begin with, the longer it takes to dry. The longer you dry the “buns” the tighter the curls will be. This is great for a nice tight curl look! If you have shorter hair, it works better to use more sections. If you have curly/wavy hair, it works best to make your “buns” as tight as possible and dry them for a little longer.
Give it a try! It’s quick and easy! For a girl who regularly spends over an hour to curl her hair, this is a nice time saver!
Do you have any tips on how this will work on your hair type?
Gorgeous beach curls in under 20 minutes #beachcurls #hairDanae

Παρασκευή 2 Αυγούστου 2013

Back-to-School Beauty Splurges and Steals

Whether you're broke or flush with cash from your summer job, we've got a list of back-to-school beauty prep tips that will suit your budget.


argaiv1129


1. Shape Your Brows


tame your eyebrows for back to schoolWell-groomed brows create a frame for your face - it's an instant way to look put-together.

Splurge: If your brows are looking bushy and you've got cash to spare, book a salon visit to get them shaped and styled.

Steal: Want to save your moolah? You can shape your brows yourself! Get started by pressing a warm, damp washcloth on brows for several seconds to soften the skin. Then use tweezers to pull out any stray hairs from beneath brows (never tweeze from above) and get those brows looking nice and neat.

Tips for DIY:

Follow the natural shape of your brows, plucking just a few hairs at a time, stepping back to check your reflection in between, and you're less likely to go overboard.

What if you've got sun-bleached brows that are barely there? Fill them in with a brow pencil in a shade close to your hair color. Make short, hair-like strokes with the tip of the pencil, for the most natural look.

Get Bronzed


bronzed skin with makeup or by spray tan


argaiv1870


Bronzed skin is in - and you can get it whether you're rich, or not-so-rich.

Splurge: Love the look of sun-kissed skin, and got dough to spend? Make a detour past the tanning salon (aka Wrinkle City), and hit a specialty salon for a spray tan to give your skin a colour boost before school goes back.

Steal: Don't have the dollars for a salon spray? Try a DIY alternative. Exfoliate your body all-over in the shower, then apply a faux tanning cream. Tip: You don't have to spend extra cash on separate body and facial tanners! Just moisturize your face first, then apply a light layer of body tanner, blending well over the jawline. And remember to follow the package instructions carefully, for the best results.

Celeb Secrets for a Fresh Face


rachel bilsonCelebrities don't roll out of bed looking perfect... they have the help of professional makeup artists! If you struggle with puffy eyes, dark circles and dull skin in the morning, keep reading. We've got star secrets to help you look awake and refreshed every morning, even if you didn't get your eight hours.


Daytime Do's

Your schedule is probably hectic, but most stars work crazy hours. So how do celebrities and their entourages work long days (and play hard in their off-time), and still manage to look fantastic? They stick to certain habits during the day, that help them look wake up looking better. So do what they do. Drink tons of water during the day (it flushes out toxins and prevents baggy eyes), and minimize your sugar and salt intake (both can cause dull and puffy skin).

Before Bed

Celebrities (especially the women) have to look great for a living. Most share a similar before-bed beauty ritual. Here's what to do:

Before you hit the hay, make sure you cleanse and tone your skin, and give it TLC for its major issues. So if you usually wake up with tight or dry skin, apply a nighttime serum to infuse skin with moisture.

If breakouts are the problem, braid or tie your hair back for sleeping (so oils from your strands don't transfer to your face) and use cleansing products that are formulated to prevent and fight acne.

A nighttime eye treatment can be nice, but use a light touch. Piling on too much cream before bed will just increase puffiness. Instead, consider using a lighter gel with brightening peptides or soothing botanicals.

When you jump in the sack, rest your head on two pillows instead of the usual one. Elevating your head during sleep can prevent fluids from settling under eyes, so you are less likely to wake up with baggage.

When You First Wake Up

Pop your eye cream or a gel eye mask in the refrigerator for five minutes to make it cool. (Don't put it in the freezer to hurry up the process though - if it's too cold you run the risk of popping a blood vessel - not very pretty!) Leave on for 20 minutes while you get dressed, eat breakfast, or get your stuff together.

If you want to go DIY, and have the time to lie down and do nothing for 10 minutes, you can also use cold tea bags. (Just brew tea, drain off the water, and pop teabags in the fridge to cool enough to place on lids). Chamomile tea is best for this, as it's a natural anti-inflammatory.


At the Mirror

To look your I'm-awake best when you head out the door, borrow these tips we gleaned from a celebrity makeup artist.

Your skin is what everyone will notice first, so get it looking gorgeous. When you're tired, you probably either suffer from breakouts, or your skin looks dull. Combat either issue by applying a tinted moisturizer with some reflective properties (we love Smashbox Sheer Focus), for skin that looks naturally radiant. Then spot-cover any blemishes or uneven patches with a light-reflective concealer. If your skin is very oily, you could also use a mineral powder foundation, for a similar effect.

Bronzer is the celeb standby for faking a healthy complexion. Choose a powder bronzer in a shade that's fairly close to your natural skin tone - the goal is to warm up your face, not fake a full-out tan. Using a large fluffy makeup brush, dust the bronzer at temples, along cheekbones, on the bridge of your nose and your chin.

Then get a rosy glow with a cream blush (we love those made by Nars and Stila) in a pinky or peachy hue, depending on which flatters your skin tone best. Apply with fingertips on the apples of cheeks and add a tiny bit on your temples.

Wake up your eyes with a light wash of sheer, shimmery eye shadow in either beige or vanilla across your lids. Just go easy on the application! The goal is to add light and wake up your look, not make your peepers look frosty.

Run a nude or pale-blue eyeliner along the insides of lower lashlines, to instantly brighten the whites of eyes.

Then curl your top lashes and apply one or two coats of mascara, to open up your eyes and draw attention away from any puffiness. (Keep mascara off lower lashes completely, to avoid the dreaded raccoon-eye effect).

Finish your makeup look with a sheer berry lip color, which will help you look polished.